
How to make one project, step by step
A project takes a handwritten concept to a first manuscript draft in six steps: Input, Novelty check, Code generation, Code execution, Manuscript and Delivery. You create an account, connect your own Claude subscription, buy a credit, create a project, and then follow the real screens below.
This guide takes you from nothing to your first running project. Allow about 15 minutes for setup, plus the time each stage needs.
Before you start
- A Windows 10 or 11 computer
- A Claude subscription, Pro or higher, on your own account
- Your handwritten concept as a photo, scan or document, and your base papers
- Your dataset, if you have one (simulation work needs none)
Walkthrough
- 1
Open the app and look at the sample projects
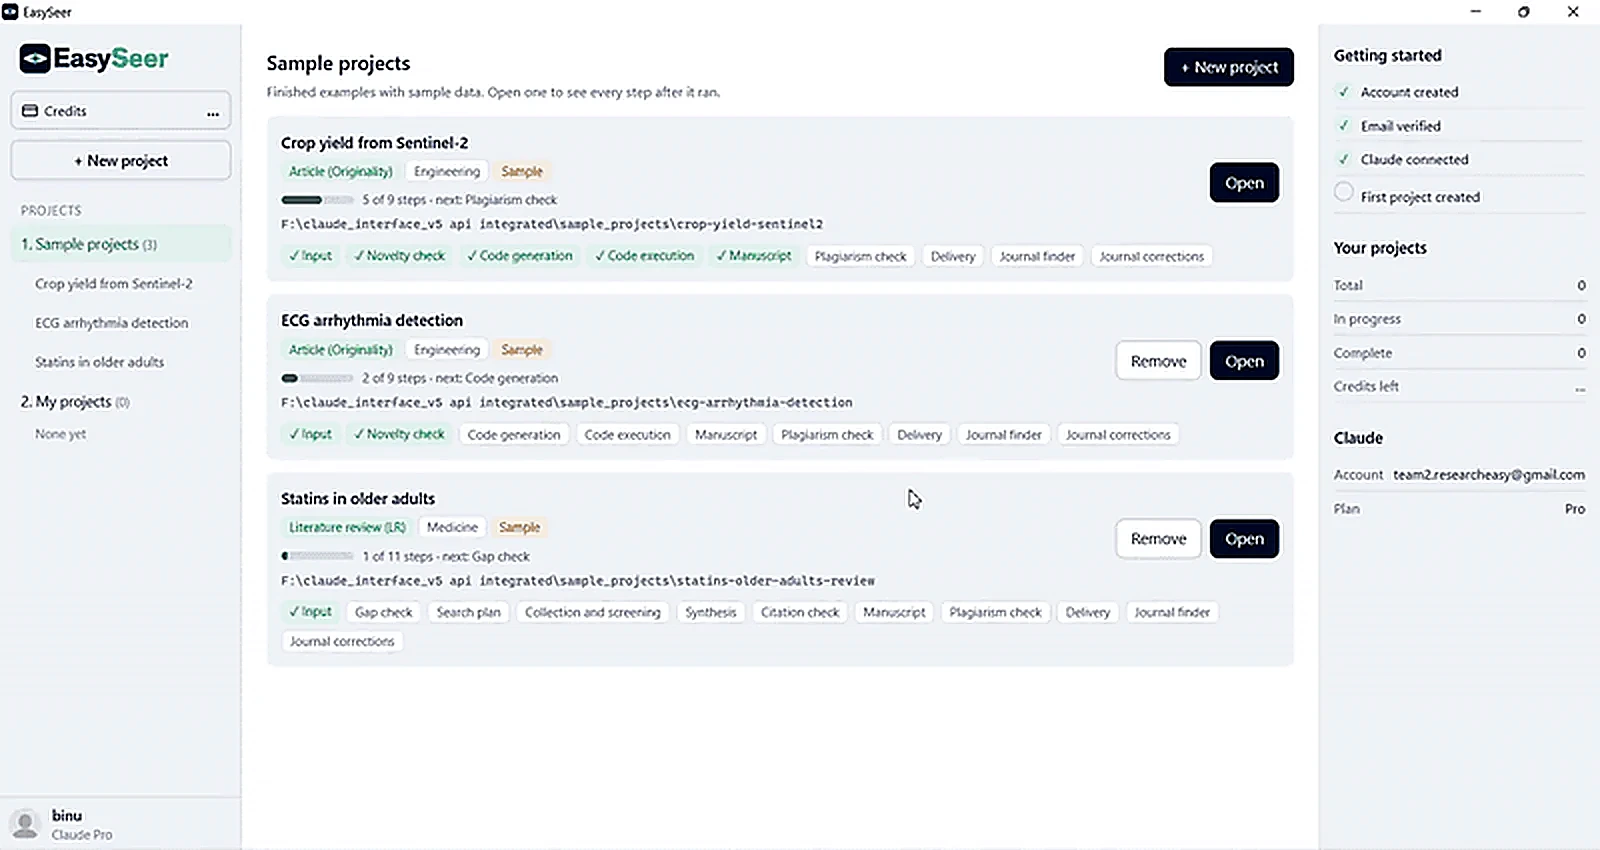
The home screen lists sample projects and your own. A Getting started checklist on the right confirms your account, verified email, connected Claude and first project.
TipOpen a sample first. It shows every step after it ran.
- 2
Create a new project in five short steps
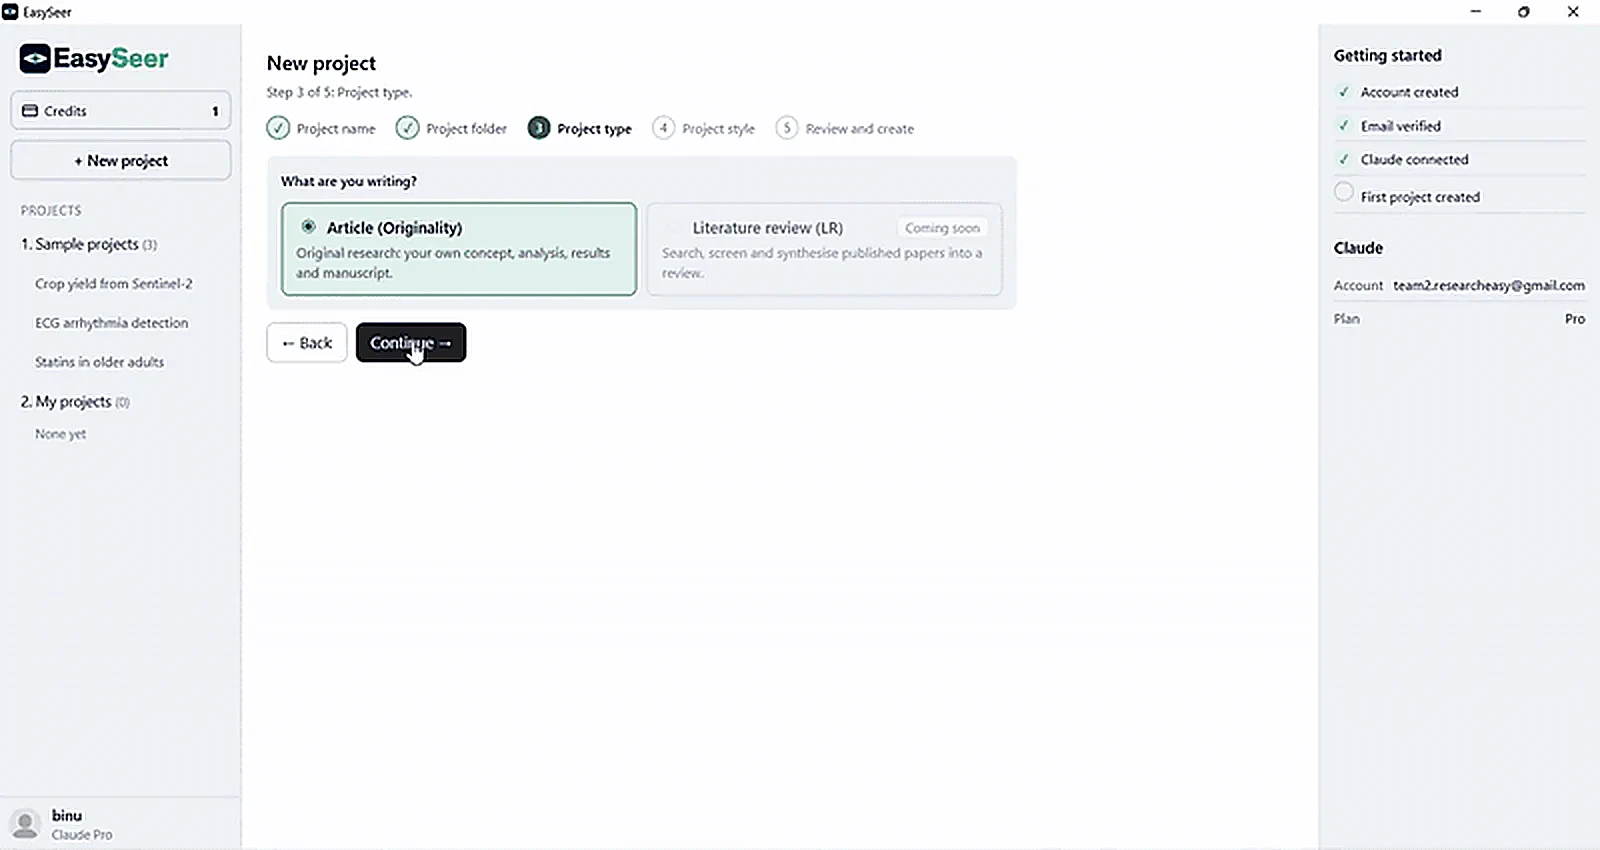
Name the project, choose its folder on your computer, choose the project type (Article, original research), choose the style (for example Engineering) and review.
TipLiterature review is shown as coming soon.
- 3
Add your concept, proposal, papers and data
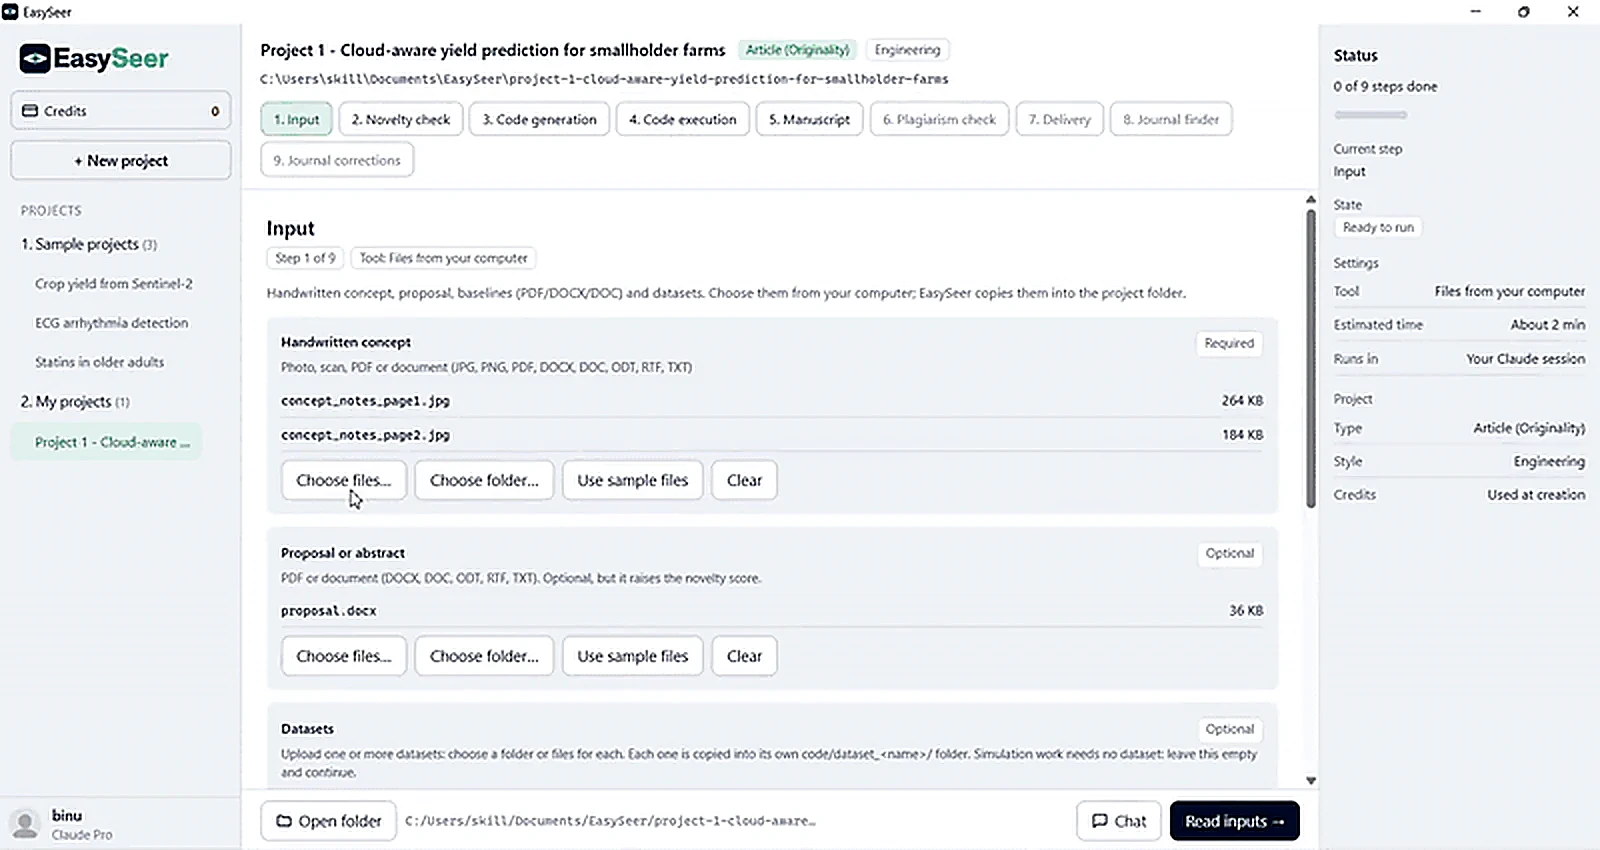
Upload the handwritten concept as photos, scans or PDF. Add a proposal or abstract, base papers and datasets if you have them. The more you add, the better the novelty score.
TipOnly the concept is required. Everything is copied into your project folder.
- 4
Start the novelty check and let it run
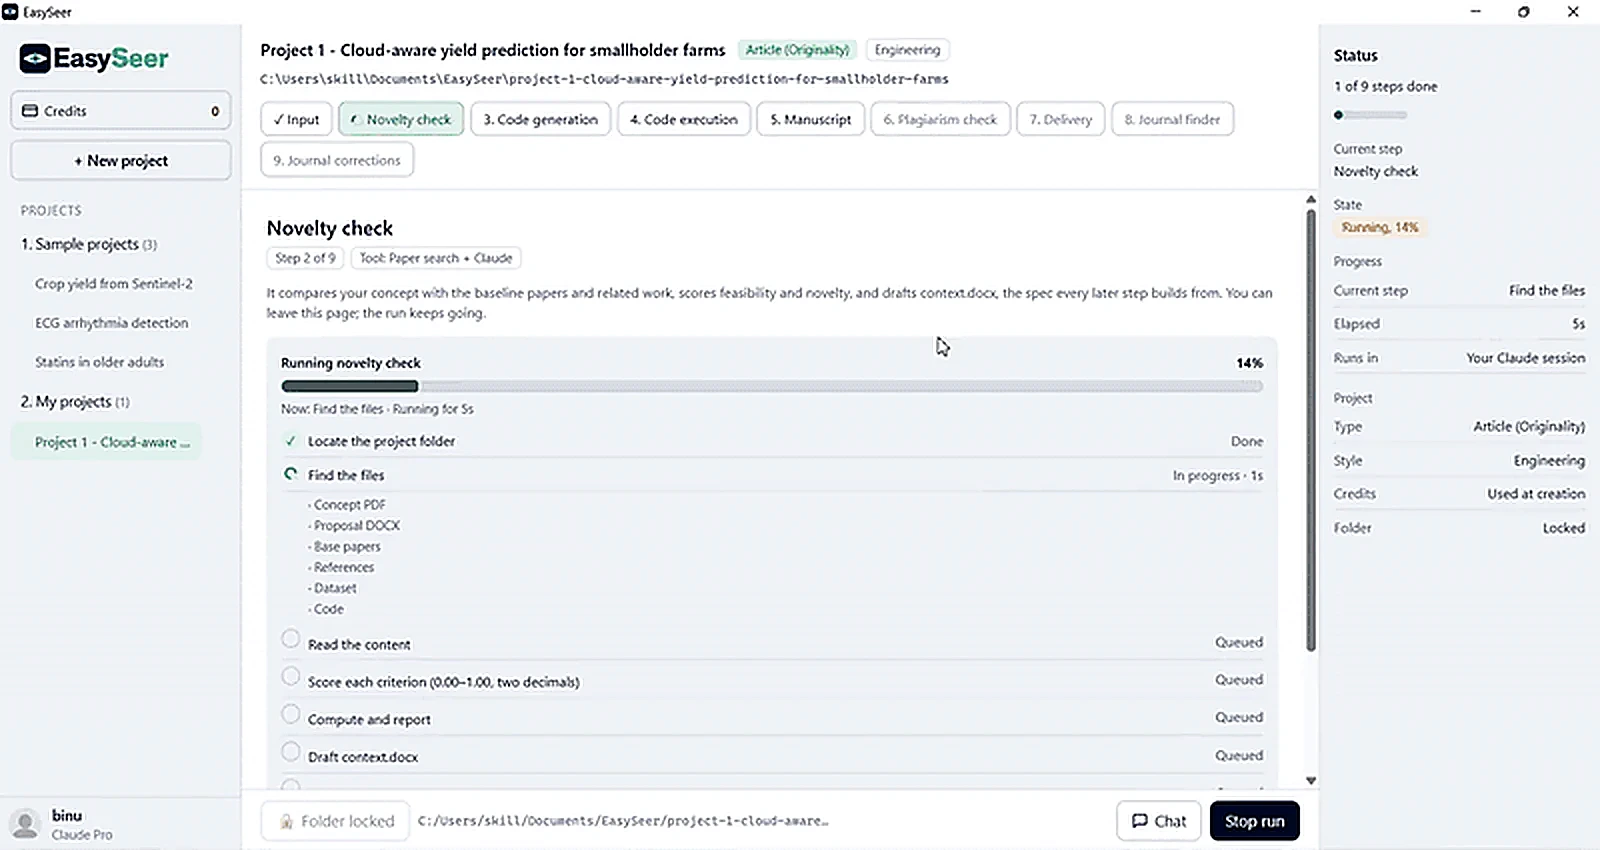
A progress list shows what EasySeer is doing: finding the files, reading the content, scoring each criterion, drafting the spec. You can leave the page; the run keeps going.
TipUse the Chat button to ask what a step is doing.
- 5
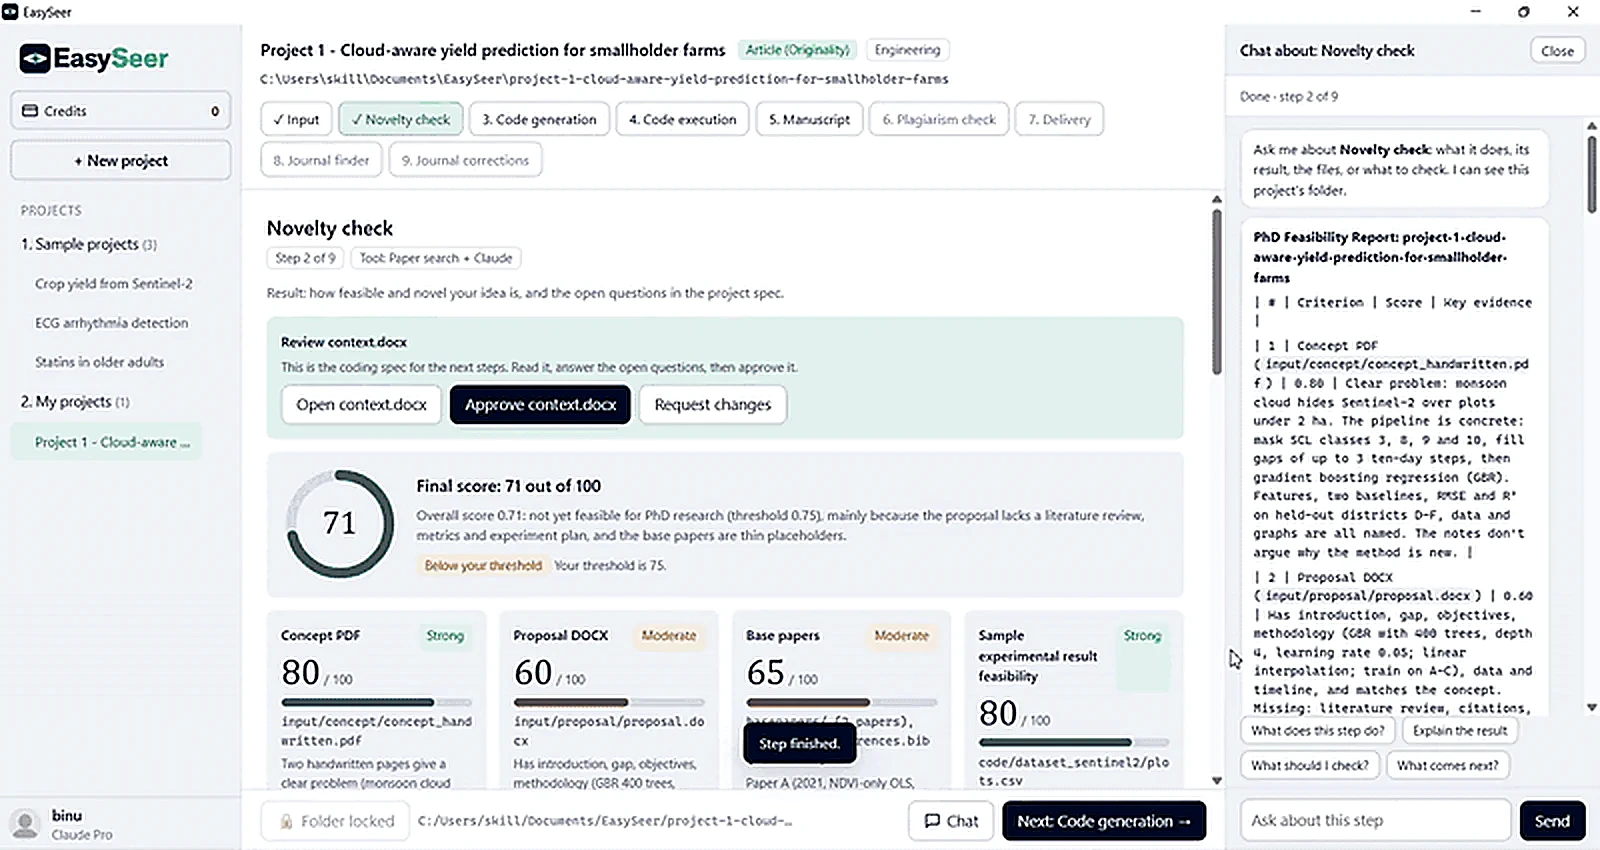
Read the score and approve the project spec
Each input is scored with a reason, then combined into a final score against your own threshold. Open context.docx, answer the open questions, then approve it or request changes.
TipA score below your threshold is a prompt to strengthen the idea, not a verdict.
- 6
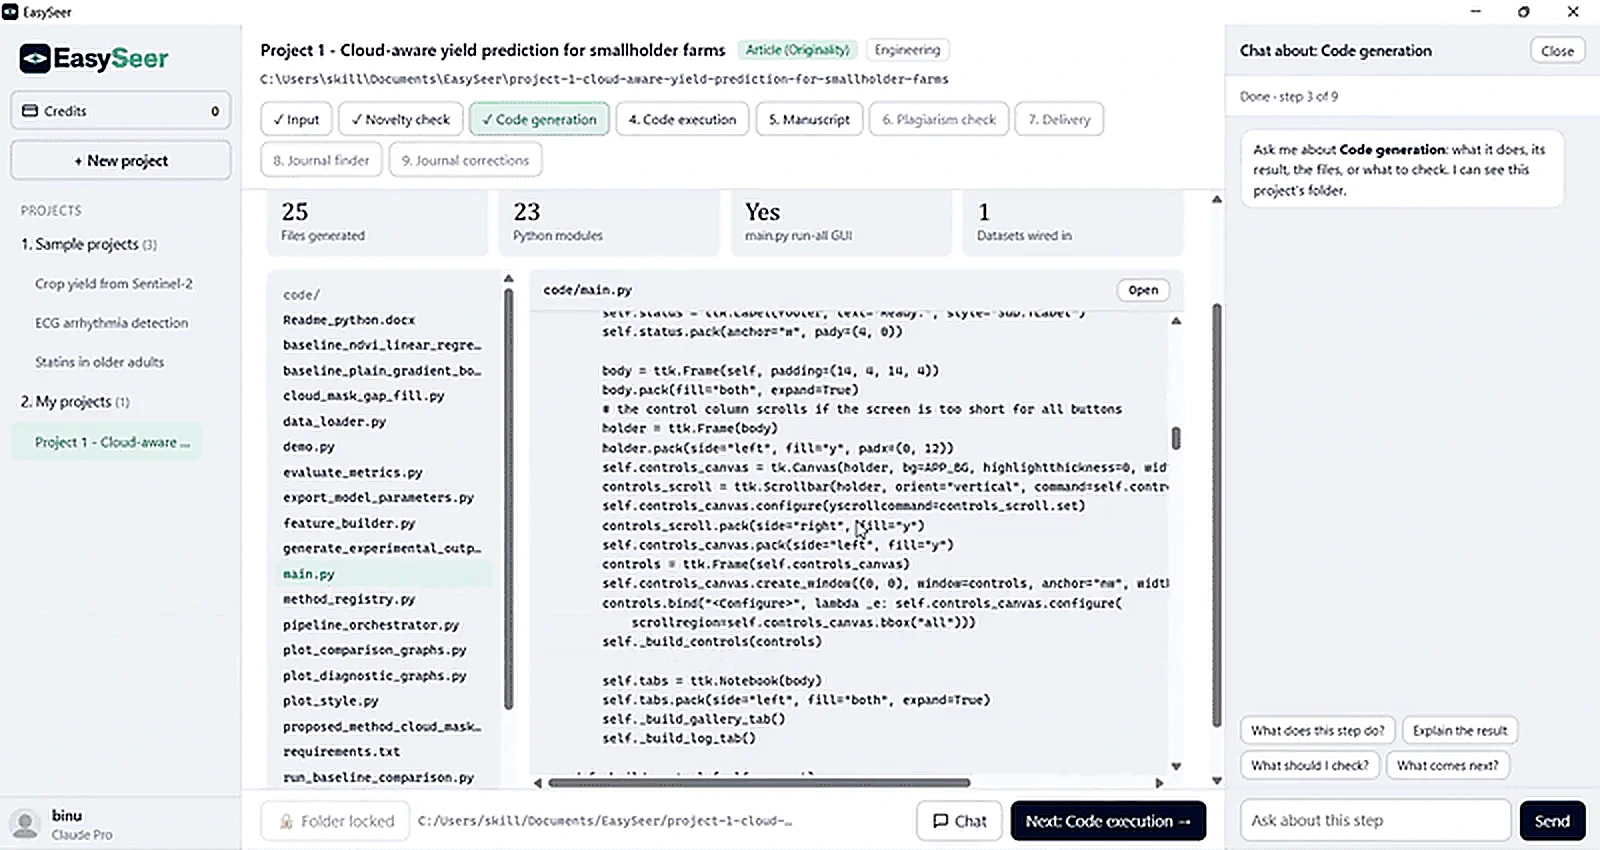
Review the generated code
The code is written as separate files with a main program. Open any file, read it and ask the chat what it does.
TipRead before you run. You are responsible for the method.
- 7
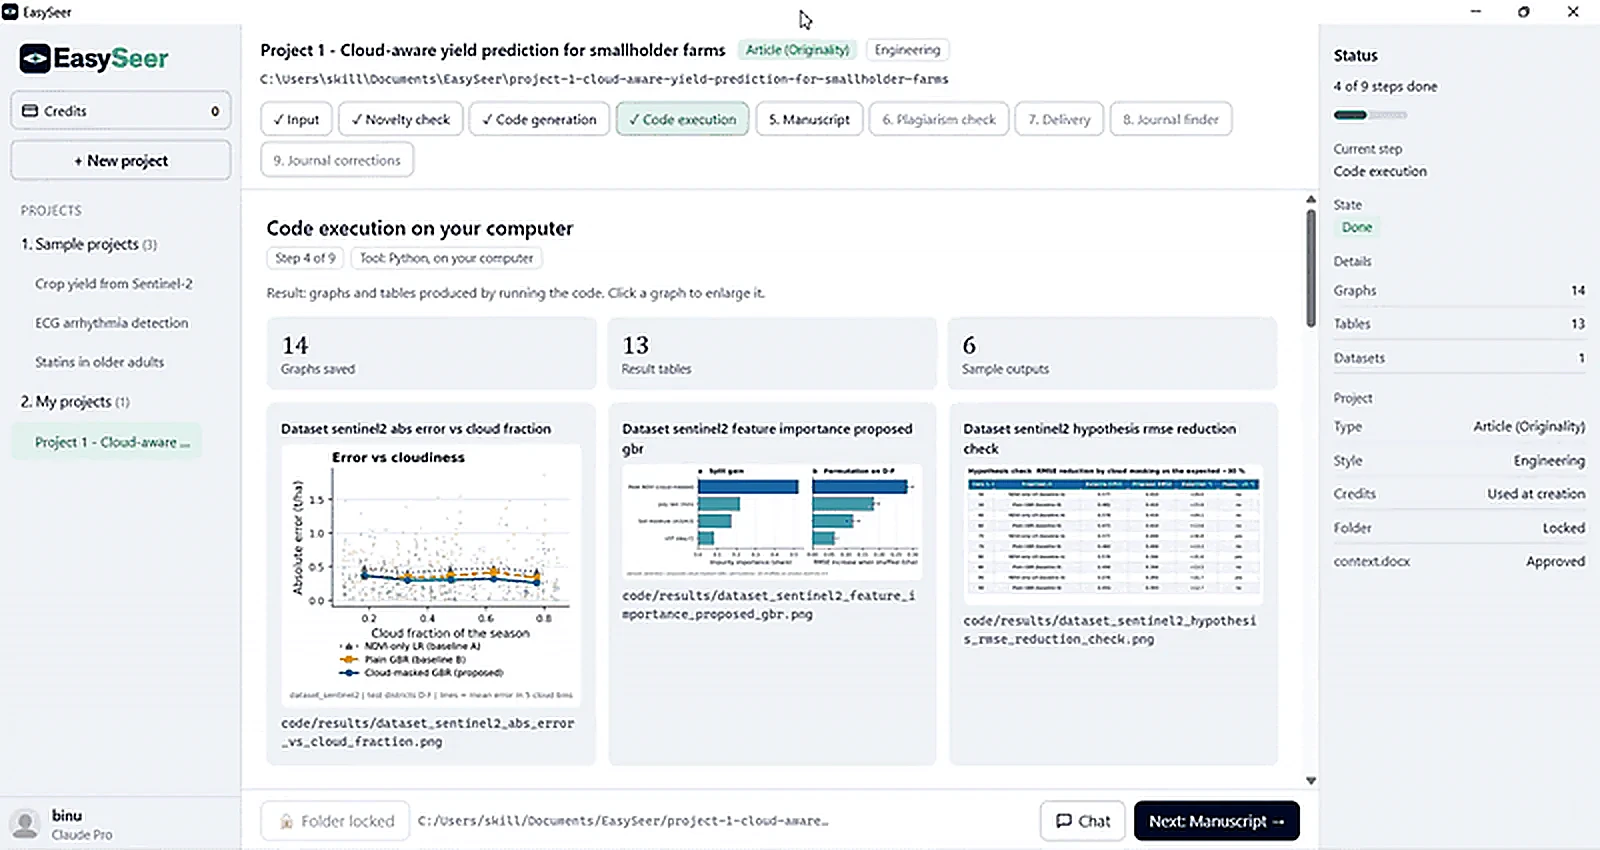
Run it and collect the results
The code runs on your computer. Graphs, tables and sample outputs are saved with their file paths. Click a graph to enlarge it.
TipCheck that every result makes sense for your data.
- 8
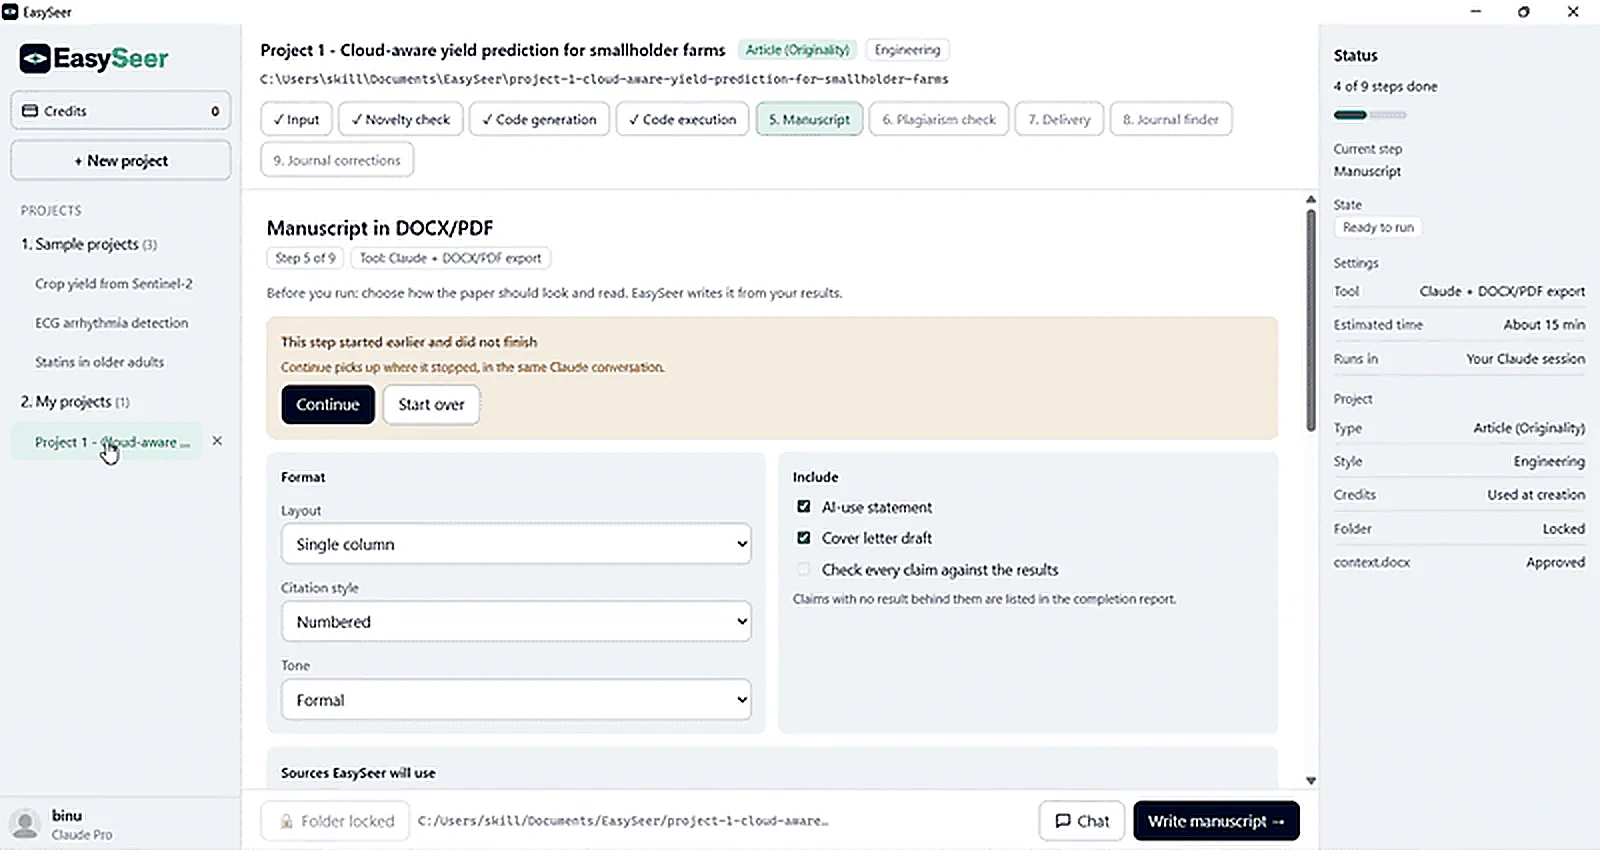
Choose the IEEE mode and tone
Pick Journal (IEEE Transactions) or Conference, and Formal or Plain and direct tone. Optionally add the IEEE LaTeX source, an AI-use statement and a cover letter draft. Every claim is checked against your results.
TipSwitch the AI-use statement on if your journal or university requires disclosure.
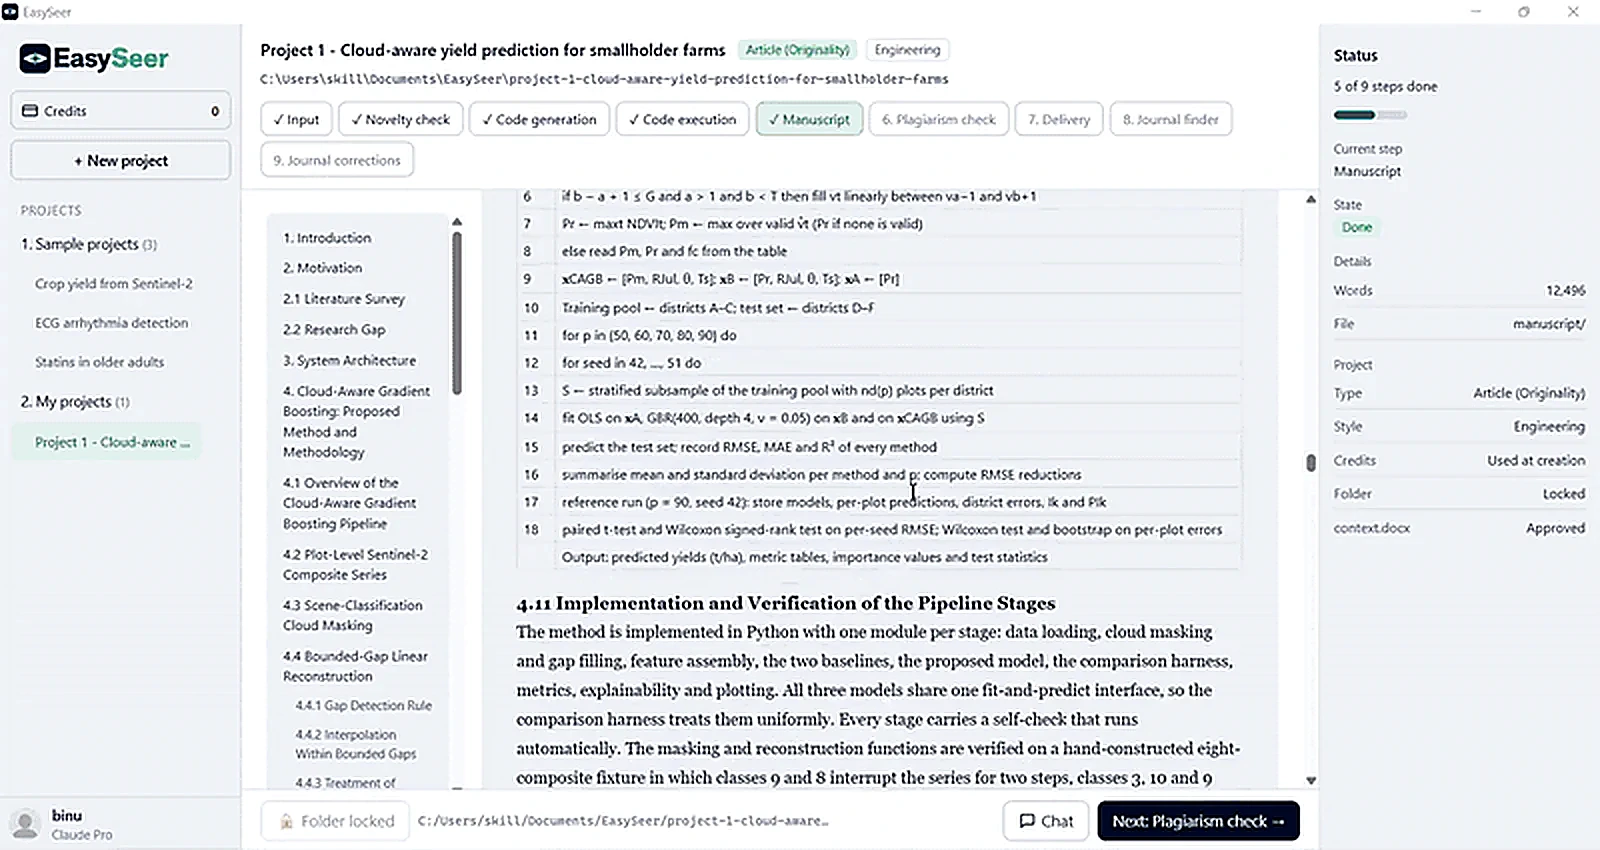
- 9
Read, verify and rewrite the draft
The draft is assembled from your results, with a section outline, equations, algorithm steps and figures. Check every number and reference, then make it yours.
TipNext come formatting and delivery.
Tips
Start with a small, clear concept for your first project
Read each stage's output before approving
Keep your project folder somewhere you can back up
Common mistakes
- Approving stages without reading them
- Uploading a blurry photo of the concept
- Forgetting to check that the dataset path is correct
Questions
How long does one project take?
Setup takes about 15 minutes. Typical run times on a laptop are about 2 minutes for Input, 8 for the Novelty check, 20 for Code generation, 25 for Code execution, 15 for the Manuscript and 20 for Delivery. Large datasets and higher Claude effort take longer.
Do I need my own data?
Not to try it. Each input has a Use sample files button. For simulation work you can leave Datasets empty and the code generates its own data.
Where do my files go?
Into a project folder on your computer, by default under Documents\EasySeer.
Related articles
How to prepare your inputs
Only the handwritten concept is required. Add a proposal, base papers and datasets if you have them:…
2 min readCredits and projects explained
One credit runs one project. A credit costs $100 worldwide (Rs 10,000 in India), is used when you cr…
2 min readHow to read your novelty score
The novelty check scores your concept, proposal, base papers and a sample experimental result out of…
2 min readEasySeer glossary
Plain-language meanings of the terms you see in EasySeer, from base papers to context.docx.…
On the blog: The research paper workflow: from idea to submission in 7 stages (8 min read)
Last updated 2026-11-09. EasySeer is AI. It creates only an initial draft from the novel concept you provide, and it is designed to follow academic ethical guidelines.